Web Console
The Web Console is a client that allows you to interact with QuestDB. It provides UI tools to query data and visualize the results in a table or plot.
Accessing the Web Console#
The Web Console will be available at http://[server-address]:9000. When
running locally, this will be http://localhost:9000.
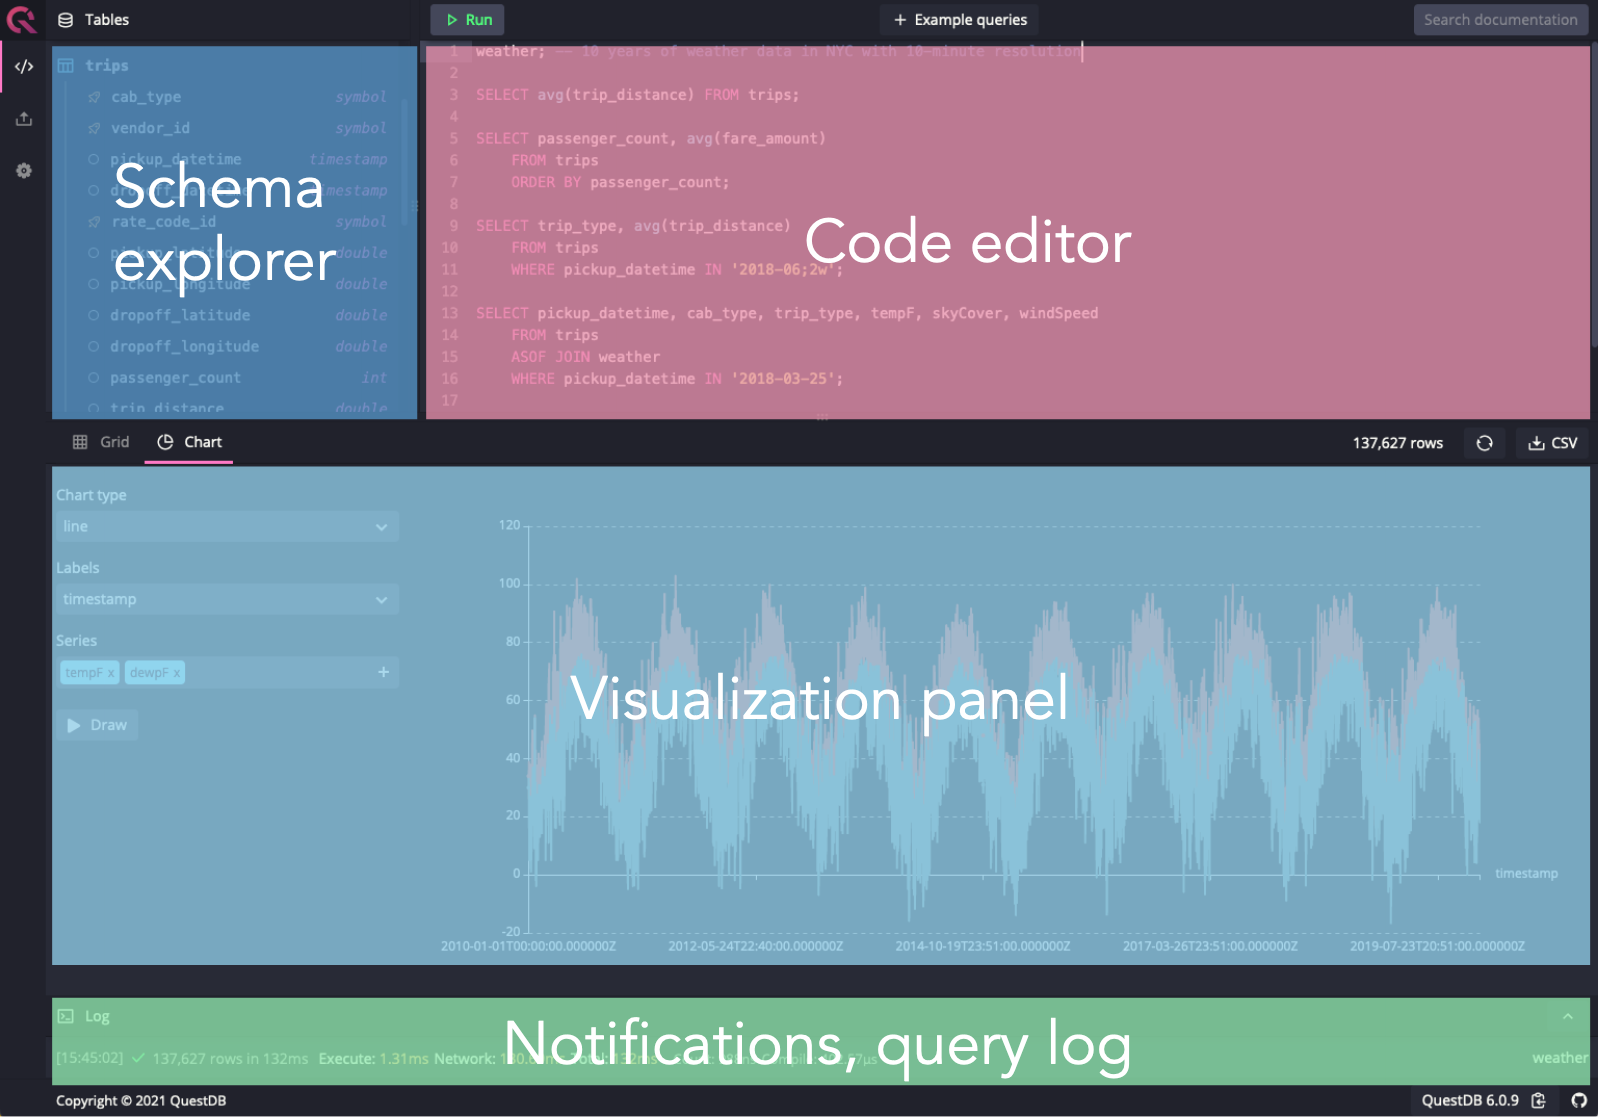
Layout#
System tables in Schema explorer#
It is possible to hide QuestDB system tables (telemetry and
telemetry_config) in Schema explorer by setting up the following configuration
option in a server.conf
file:
Code editor#
The default panel shown in the web console is the code editor which allows you to write and run SQL queries.
Shortcuts#
| Command | Action |
|---|---|
| Run query | f9 or ctrl/cmd + enter |
| Locate cursor | f2, use this to focus the SQL editor on your cursor in order to locate it |
Behaviour#
As you can write multiple SQL commands separated by a semicolon, the Web Console uses the following logic to decide which queries to execute:
- Check if a query or part of a query is highlighted. If yes, it will be executed, otherwise:
- Check if the cursor is within a SQL statement. If yes, the statement will be executed, otherwise:
- Check if the cursor is on the same line as a SQL statement and after the semicolon. If yes, this statement will be executed, finally:
- If the cursor is on a line that does not contain a SQL statement, the next encountered statement will be executed. If there is no statement after the cursor, the previous statement will be used.
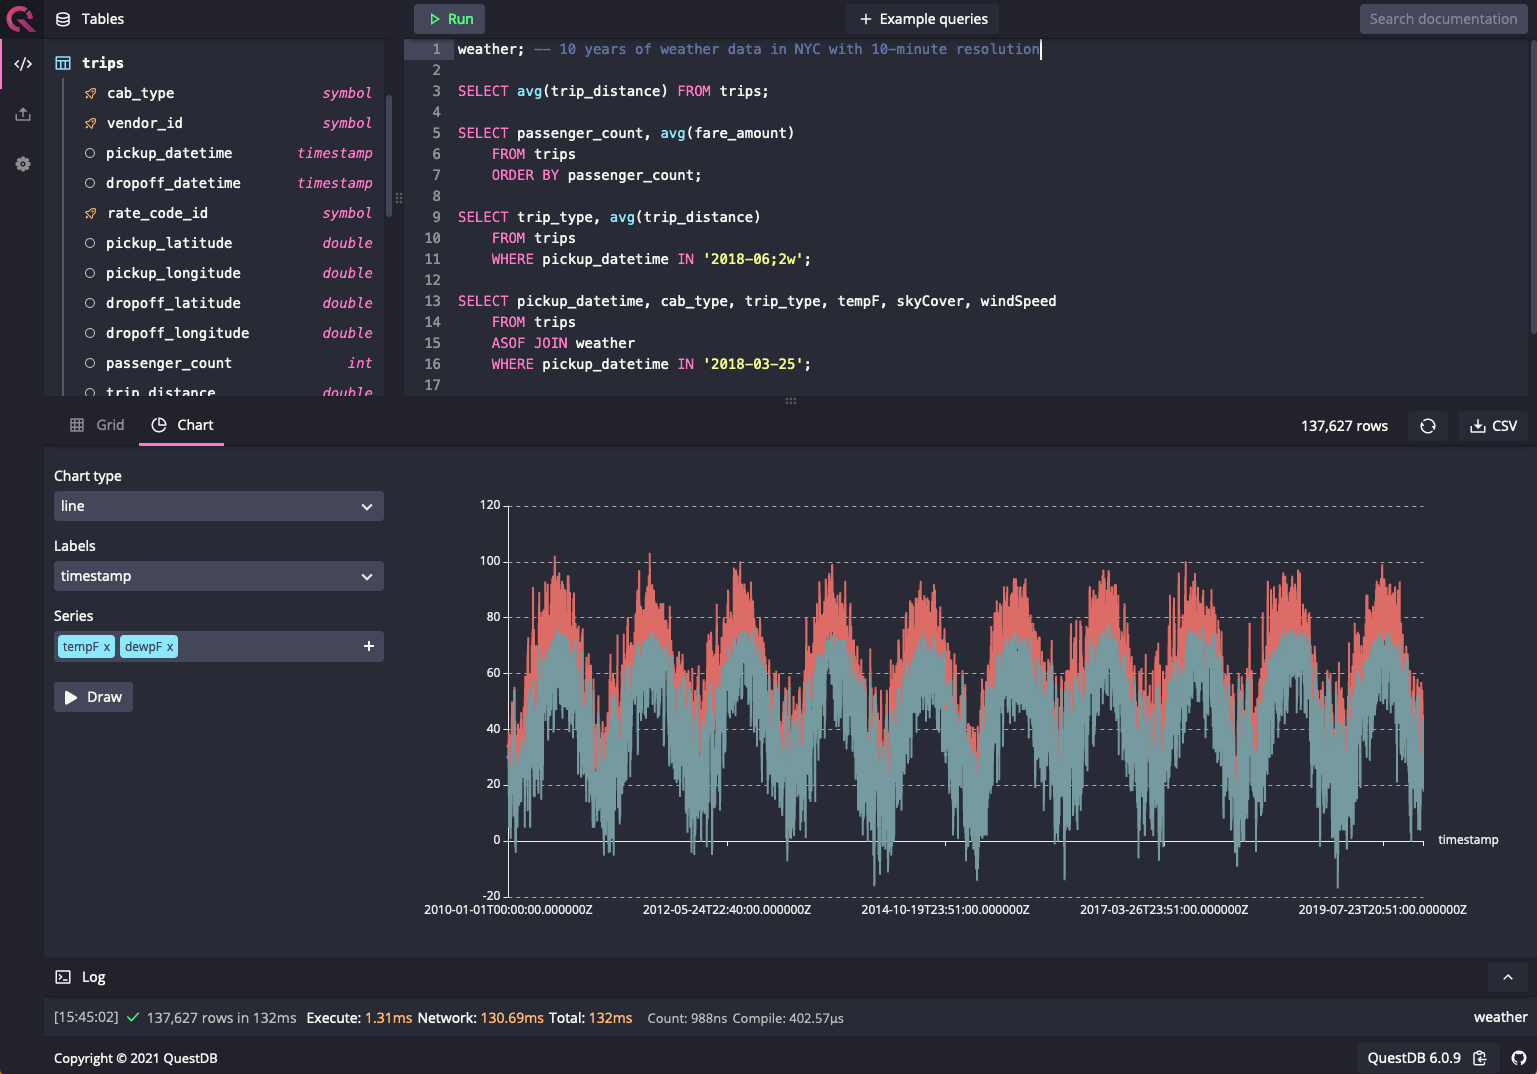
Visualizing results#
You can run a query and click on the Chart button. This will display the chart
editor. You can then choose chart type, for example line and then press
Draw.
Downloading results#
You can download the query result by clicking the CSV button. This file will
be useful to test the import functionality below.
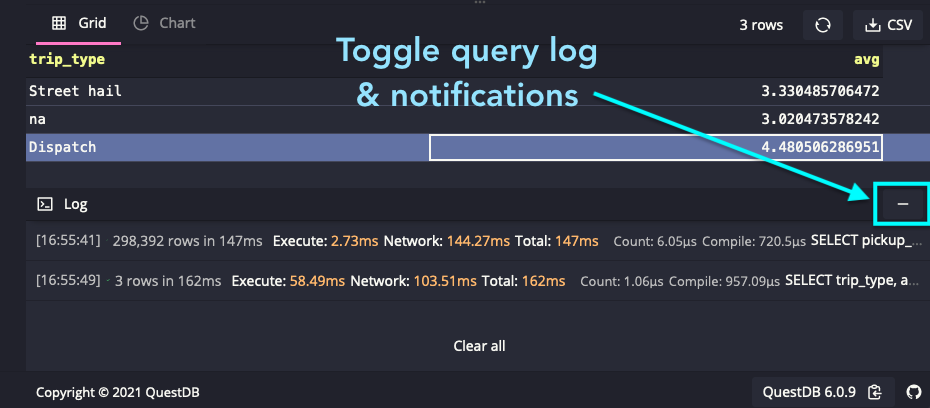
Notification panel#
The panel at the bottom of the web console shows the status of the most-recent query. This panel can be toggled by clicking the up-arrow icon on the right of the panel and shows the last 20 messages and notifications after query execution.
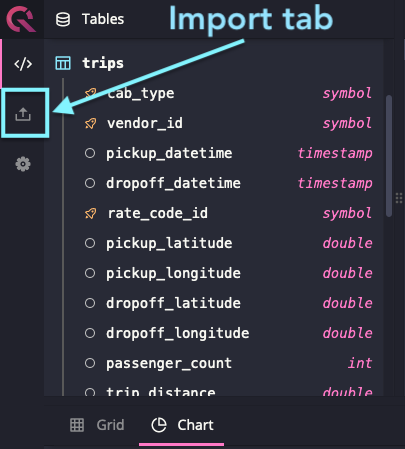
Import#
The import tab can be accessed by clicking this icon on the left-side navigation menu:
Import details#
Description of the fields in the import details table
| Column | Description |
|---|---|
File name | Name of the imported file. If imported from copy & paste, an automatically-generated file name |
Size | Size of the imported file |
Total rows | Number of rows successfully imported |
Failed rows | Number of rows that failed to import |
Header row | Whether the dataset has been recognized to have a header row or not |
Status | Status of the import. See import statuses |
Import statuses#
Description of the import statuses
| Status | Description |
|---|---|
importing | Data is currently being imported |
failed | Import failed, no data was imported |
imported in [time] | Import is finished. The completion time is displayed next to the status |
exists | You are trying to import a file that already exists. To import it regardless, you can either append or override. See importing again for a more exhaustive description |
Amending the schema#
Although the schema is automatically detected, you can amend the type of any column of an imported data set using the following steps:
- Click on the file you want to amend in the Import screen. The schema will be displayed in a table in the lower-half of the screen.
- Click the column which type you want to change. A drop-down list allows for selecting a type for the column.
- You will then need to re-trigger the import.

Custom import#
You can amend the import behavior with the following options. This will trigger to import the data again.
| Option | Name | Description |
|---|---|---|
A | Append | Uploaded data will be appended to the end of the table |
O | Override | Uploaded data will override existing data in the table |
LEV | Skip lines with extra values | Skips rows that contain values that don't align with the schema |
H | Header row | Flag whether the first row should be considered to be a header row |
To start the import, click the following button:

Providing an asset path#
It's possible to provide an asset path if QuestDB is being run from somewhere
that is not the server root. In this case, create a .env file in the UI
directory of QuestDB and provide the path to web console assets as follows:
An
example dotenv
file is provided which can be renamed to .env and placed in QuestDB's UI
directory.